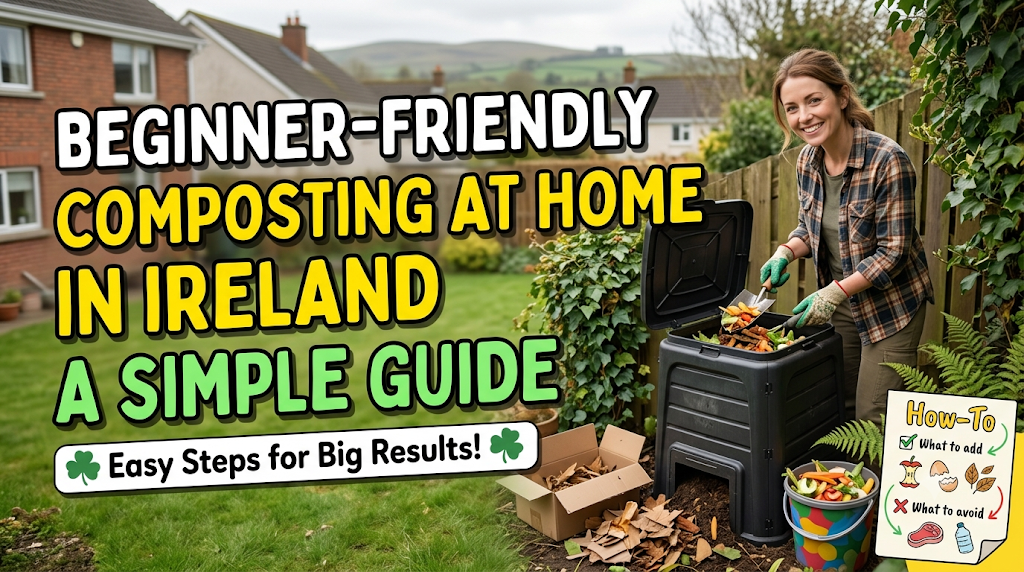
Composting at home in Ireland is a simple way to recycle suitable kitchen and garden waste while creating useful organic matter for your plants. You do not need a large garden, specialist equipment or advanced gardening skills to begin.
A successful compost system mainly needs three things: the right materials, enough air and suitable moisture. Ireland’s frequent rainfall can make compost too wet, but this is easy to manage when you add enough dry, carbon-rich material.
Whether you have a large garden, a small patio or only a little outdoor space, this guide explains how to choose a compost bin, what to add, what to avoid and how to solve common problems.
What Is Home Composting?
Home composting is the natural breakdown of organic materials such as vegetable peelings, leaves and grass. Microorganisms gradually transform these materials into a dark, crumbly soil conditioner.
Finished compost can help:
- Improve soil structure
- Add organic matter to borders and raised beds
- Support moisture retention
- Reduce the amount of suitable waste sent for disposal
- Provide a useful mulch around established plants
Compost is not a replacement for every fertiliser or growing medium. It is best used as a soil improver, mulch or ingredient in suitable planting mixes.
Step 1: Choose the Right Composting Method
The best composting method depends on your available space, the amount of waste you produce and how quickly you want results.
Traditional compost bin
A standard compost bin is suitable for many gardens. It holds kitchen scraps, garden waste and shredded paper while allowing the material to break down over time.
Choose a location that is:
- Easy to reach from the kitchen or garden
- On soil or another suitable base
- Partly sheltered from strong wind
- Not directly against a wall or building
- Convenient for adding materials and removing compost
Placing the bin on soil allows worms and other organisms to enter naturally. However, ensure the site does not become waterlogged.
Compost tumbler
A compost tumbler is raised from the ground and can be turned by hand. It may suit a small garden or anyone who wants a neater system.
Benefits include:
- Easy turning
- A tidy appearance
- Less bending
- Reduced contact with the ground
A tumbler can dry out more quickly than a traditional bin, so check moisture regularly.
Wormery
A wormery uses composting worms to process suitable food scraps. It can work well where outdoor space is limited, including patios and balconies.
A wormery needs:
- Shade or protection from strong heat
- Suitable bedding material
- Food added in small quantities
- Good drainage
- Protection from extreme cold and heavy rain
Follow the manufacturer’s instructions because wormeries differ from ordinary compost bins.
Bokashi system
Bokashi is a fermentation system rather than traditional aerobic composting. It can process a wider range of kitchen scraps than many ordinary bins, but the fermented material usually needs to be buried in soil or added to a separate composting stage.
It may be useful for people with little garden space, but beginners should understand the additional steps before buying a kit.
Step 2: Understand Green and Brown Materials
A healthy compost mixture needs a balance of moist, nitrogen-rich materials and dry, carbon-rich materials.
Green materials
Green materials are usually moist and provide nitrogen. Examples include:
- Fruit and vegetable peelings
- Fresh grass clippings
- Coffee grounds
- Fresh plant trimmings
- Young weeds before they produce seeds
- Tea leaves and suitable tea bags
- Old flowers
- Soft green garden waste
Brown materials
Brown materials are generally dry and provide carbon. Examples include:
- Dry leaves
- Torn cardboard
- Plain paper
- Small twigs
- Straw
- Untreated wood shavings
- Egg boxes
- Dead plant stems
- Small amounts of shredded newspaper
In Ireland, adding extra browns is often useful because rain and wet kitchen scraps can make a compost pile soggy. Keep a supply of torn cardboard, dry leaves or plain paper beside the bin so you can add it whenever the mixture becomes too wet.
A simple layering approach
You do not need to measure every ingredient. Instead:
- Add a layer of brown material.
- Add food scraps or fresh green waste.
- Cover the fresh material with more browns.
- Repeat as materials become available.
- Turn or mix the contents occasionally.
The mixture should be damp like a wrung-out sponge, not dripping wet.
Step 3: Know What to Put in a Compost Bin
The accepted materials depend on the type of system you use. A traditional garden compost bin is generally best for plant-based kitchen waste and garden materials.
Suitable materials
| Material | Helpful Tip |
|---|---|
| Vegetable peelings | Chop large pieces to help them break down |
| Fruit scraps | Add extra browns if the mixture becomes wet |
| Coffee grounds | Mix them through rather than adding a thick layer |
| Tea leaves | Remove staples and plastic packaging |
| Eggshells | Crush them before adding |
| Grass clippings | Add thin layers to avoid compacting |
| Dry leaves | Store some for use during wet periods |
| Cardboard | Tear it into small pieces and remove plastic tape |
| Small garden prunings | Chop woody material into smaller pieces |
| Annual weeds | Add them before they develop mature seeds |
| Old flowers | Remove large, woody stems |
| Plain paper | Shred or tear it into smaller pieces |
Chopping or tearing materials increases the surface area available to decomposers. As a result, smaller pieces usually break down more easily.
Step 4: Know What Not to Add
Some materials can attract pests, create strong smells, spread disease or break down poorly in a basic home compost bin.
Avoid adding:
- Meat
- Fish
- Bones
- Dairy products
- Oily or greasy food
- Cooked meals
- Pet waste
- Cat litter
- Diseased plants
- Perennial weed roots
- Weeds carrying mature seeds
- Glossy or plastic-coated paper
- Coal ash
- Treated or painted wood
- Large branches
Meat, dairy and cooked food may be accepted in a local brown-bin collection, but that does not mean they belong in a basic home compost bin. Always check the instructions for your local authority or waste provider.
Pet waste should not be added to ordinary garden compost used around food crops. Special systems exist for some types of animal waste, but they require separate handling.
Step 5: Start Your Compost Bin Correctly
A good starting structure helps prevent many problems later.
Base layer
Begin with a layer of coarse brown material, such as:
- Small twigs
- Dry leaves
- Torn cardboard
- Straw
- Coarse garden stems
This helps air move through the lower part of the bin.
Add a mixture
Add green and brown materials in alternating layers. Avoid putting a large amount of grass clippings or food scraps in one thick layer because they can become compacted and airless.
Cover fresh scraps
Always cover exposed food scraps with brown material. This can reduce smells and make the bin less attractive to flies.
Keep the lid secure
A lid helps protect the contents from heavy rain. If your bin does not have a lid, cover the top with cardboard, leaves or a breathable material, while still allowing some air to enter.
Step 6: Manage Moisture in Ireland’s Climate
Wet compost is one of the most common problems with composting at home in Ireland. Heavy rain, fresh grass and kitchen scraps can combine to create a dense, unpleasant mixture.
Signs your compost is too wet
- It smells sour or rotten.
- The contents look slimy.
- Water collects at the bottom.
- The pile appears compressed.
- It produces very little heat or visible breakdown.
How to fix wet compost
- Add plenty of torn cardboard or dry leaves.
- Mix the contents with a garden fork.
- Remove any obvious standing water.
- Check whether the bin has adequate drainage.
- Reduce the amount of fresh grass added at one time.
- Cover the top during periods of heavy rain.
Avoid adding only more food scraps to a wet bin. The extra moisture can make the problem worse.
Step 7: Keep the Compost Aerated
Composting organisms need oxygen. If the contents become compacted, anaerobic decomposition may occur, causing unpleasant smells.
Turn or mix the compost occasionally using:
- A garden fork
- A compost aerator
- A hand tool for smaller systems
- The handle of a suitable tool, if the bin design allows it
You do not need to turn the pile every day. Mix it when it looks compacted, smells unpleasant or contains dense layers of grass and food scraps.
A traditional compost bin can take several months to produce finished compost. The exact time depends on material size, moisture, temperature, air and how often the pile is mixed.
Step 8: Handle Grass Clippings Properly
Grass clippings are useful green material, but adding too many at once can create a thick, wet layer.
Use grass clippings more effectively by:
- Allowing them to dry slightly before adding
- Mixing them with dry leaves or shredded cardboard
- Adding thin layers
- Spreading some directly around suitable plants as mulch
- Avoiding large clumps
If your lawn has been treated with weedkiller or other products, follow the product instructions before adding clippings to compost intended for the garden.
Step 9: Compost in a Small Garden
You can still practise composting at home in Ireland without a large outdoor area.
Options for limited space
- A compact compost bin
- A small tumbler
- A wormery
- A lidded food-scrap system
- A shared community composting scheme, where available
- A council or waste-provider brown-bin service
A small indoor caddy can collect kitchen scraps before you transfer them outside. Empty it regularly and clean it to prevent smells.
If you live in an apartment or rented home, check whether a communal composting or organic-waste service is available. Do not install a large system on a balcony unless the structure, drainage and landlord or management rules allow it.
Step 10: Recognise Finished Compost
Finished compost usually has several recognisable features:
- Dark brown colour
- Crumbly texture
- Earthy smell
- Few recognisable food scraps
- Moderate moisture
- No strong rotten odour
Some woody pieces may remain. You can remove them and return them to the bin for further breakdown.
Do not worry if the compost is not perfectly uniform. Homemade compost often contains a mixture of fine material and small partially decomposed pieces.
How to Use Homemade Compost
Use mature compost in moderation around the garden.
Soil improvement
Work a layer into borders or raised beds before planting. Mix it with existing soil rather than creating a thick layer directly against plant stems.
Mulching
Spread compost around established plants, leaving a small gap around stems and trunks. This can add organic matter and help protect the soil surface.
Container planting
Use mature compost as part of a suitable potting mix rather than filling containers entirely with homemade compost. Pure compost may hold too much moisture or lack the structure needed for some plants.
New planting areas
Mix compost into poor or compacted soil before planting. Combine it with the existing soil so roots can adapt to the growing conditions.
Avoid using unfinished compost around delicate seedlings. It may still be decomposing and can contain recognisable food scraps, weed seeds or material that competes for nitrogen.
Common Composting Problems and Solutions
| Problem | Likely Cause | Practical Solution |
|---|---|---|
| Bad smell | Too wet or compacted | Add browns and turn the pile |
| Compost is not breaking down | Too dry, too cold or too little green material | Add moisture and mix the contents |
| Many flies | Exposed food scraps | Cover scraps with brown material |
| Compost is slimy | Excess moisture | Add dry leaves or cardboard |
| Grass forms thick clumps | Too many clippings together | Add thin layers and mix with browns |
| Rodents are visiting | Food waste, open access or poor location | Avoid meat and cooked food; secure the bin |
| Contents are very dry | Too many browns or insufficient moisture | Add a small amount of green material or water |
| Large pieces remain | Material was too coarse | Chop materials and return them to the bin |
A few small flies around a compost bin may be normal. Persistent pest activity, however, suggests that the contents or bin design needs attention.
Composting and the Brown Bin
Home composting and brown-bin collection are not identical.
A household compost bin is generally used for suitable garden waste and plant-based kitchen scraps. A brown bin or organic-waste collection may accept additional food waste according to local rules.
Accepted materials vary between waste providers and local authorities. Check the latest guidance before placing meat, fish, cooked food, dairy or other items in a brown bin.
If you cannot compost certain food waste at home, use the correct local collection service rather than putting it in the wrong bin.
Beginner Composting Checklist
Before you begin, make sure you have:
- A suitable compost bin or wormery
- A convenient, well-drained location
- A small kitchen caddy
- A supply of brown materials
- A garden fork or compost aerator
- A way to protect the bin from excessive rain
- Clear information about local brown-bin rules
Then follow this routine:
- Add a brown layer.
- Add suitable green material.
- Cover fresh scraps.
- Check moisture each week.
- Add more browns when necessary.
- Mix the contents when compacted.
- Wait until the compost is dark and crumbly.
- Use it around the garden in moderate amounts.
Conclusion
Composting at home in Ireland is easier when you keep the process simple. Choose a suitable system, combine green and brown materials, protect the bin from excessive rain and provide enough air.
The most important habit is to keep dry materials nearby. Torn cardboard, dry leaves and plain paper can quickly correct a wet compost bin. With regular observation and a little patience, your kitchen scraps and garden waste can become a useful soil improver for your plants.
Start with a small compost bin, learn how the materials behave and adjust gradually. A simple, well-managed system is more useful than an oversized bin that is difficult to maintain.
Frequently Asked Questions
Is composting at home in Ireland difficult?
No. Beginners can start with a small bin, suitable plant-based materials and a supply of dry browns. The main tasks are checking moisture, covering food scraps and mixing the contents occasionally.
What can I put in a home compost bin?
You can generally add fruit and vegetable peelings, coffee grounds, tea leaves, eggshells, grass clippings, dry leaves, torn cardboard, plain paper and small amounts of garden waste. Check your system’s instructions before adding unfamiliar materials.
Can I compost meat and dairy at home?
Meat and dairy are not usually recommended for a basic garden compost bin because they can attract pests and create odours. They may be accepted in a local brown-bin collection, so check the current guidance from your waste provider.
Why does my compost smell bad?
A bad smell usually indicates excess moisture, poor aeration or too much fresh material. Add dry leaves or torn cardboard, mix the contents and check that water can drain away.
How do I compost during wet Irish weather?
Use a lidded bin, place it on well-drained ground and add extra brown materials such as dry leaves or cardboard. Avoid adding large amounts of wet grass or food scraps at once.
How long does homemade compost take?
The time varies according to the bin, materials, temperature, moisture and turning frequency. A well-managed pile may break down over several months, while a neglected or cold pile may take longer.
Can I compost in a small garden or apartment?
Yes. Compact bins, tumblers and wormeries can suit small outdoor spaces. Apartment residents may also be able to use communal composting or a local organic-waste collection service.
Can homemade compost be used in pots?
Yes, but use mature compost as one part of a suitable potting mix rather than filling containers entirely with homemade compost. Screening out large pieces can make it easier to use.